
Follow John Bohlinger as he shows you how to quickly upgrade your sound with a speaker-swap tutorial.
For today’s mod, we're got three core pieces of gear: A StewMac ’66 D-Reverb, which is inspired by the classic Fender Deluxe; a StewMac Pre-wired speaker harness; and a ToneSpeak Austin, which is a 12-inch, 50-watt, 8 ohm speaker, but you can do this kind of speaker replacement on any 1x12 or 2x12 combo. And remember, always match the ohm rating of your amp to your speaker. If you don't do this, you could blow a speaker or damage your circuit. No bueno.
Step 1: So, let's start with our D-Reverb amp. Put a towel down on the floor or your work bench or table, to protect the amp’s face, and put your combo face down on that towel. You'll next need to take your wire clippers and cut the wires at about one inch away from the mounting posts on the speaker that they're connected to. That inch will come in handy later if you want to de-solder the wire ends from the speaker, so you can re-use the speaker later, for another cabinet.
Step 2
Step 2: With the wires separated from the speaker, unplug the wires from the 1/4-inch speaker output jack on the back of the amp, and then remove the wiring. You don 't need to have a set of loose, dangling wires in your way when you remove the speaker or install its replacement.
Step 3
Now, using your drill—set to a gentle speed—or using your screwdriver, you'll want to unscrew all the screws holding the speaker to its frame in the speaker cabinet. Be careful to place each screw in a small container as you remove them. And when you've removed them all and placed them in your container, put the lid on it. You don't want to drop a screw and have to hunt for it on your hands and knees, or misplace one, because you're going to need them to put the replacement speaker in.
Step 4
Gently lift out the original speaker.
Step 5
Inspect your replacement speaker—our Tone Speak Austin— one more time to be sure there are no obvious flaws, and then move it into place, aligning its screw holes over the screw holes in the frame.
Step 6
Open your container, and use the screws you saved to screw the new speaker gently and securely into place.
Step 7
Now it's time to wire the Tone Speak Austin speaker up. I like to use a fresh wire harness, because if you're replacing a speaker, there is a good chance the old wire harness has been in place for a while. There's nothing better than a fresh start. So, in this case, I'm using the StewMac harness, which comes pre-wired and ready to go—which saves a lot of steps. There's no wire cutting, no attaching a 1/4-inch jack or speaker post connectors to the wires. Just plug the harness’ 1/4 -inch jack into the speaker out on the back of the combo, and, since the StewMac harness is pre-wired with clips, just slide the clips over the speaker posts. You can solder those in place later, so they don't come loose, but right now you can pick up the amp, plug it into an outlet, and plug in a guitar to test the speaker. And it's gonna fire up and sound good, since the only connections you've made so far are plug and play.
Step 8
Once you know that everything works, just place the speaker back down on its face and start heating up your soldering iron. You'll want to make the joints of the speaker posts and speaker wire harness clips permanent. Otherwise, the wires will shake loose with travel or use. It's also a good idea to put a piece of aluminum foil under the area where you'll be soldering, to protect your new speaker from any drips of solder that might fall.
Austin 1250 Speaker
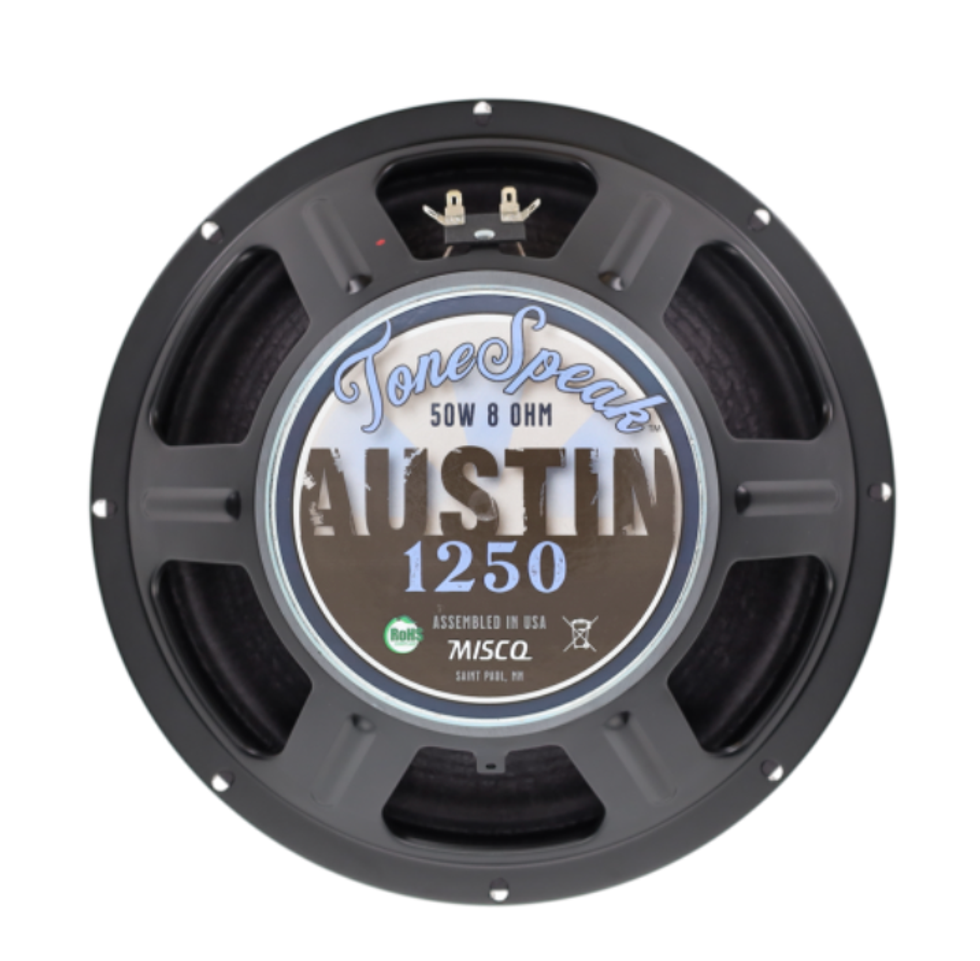
Balance, punch, fullness, and clarity are at the forefront of this speaker. The mids are tailored and even, enabling the articulation, openness, air, and a nice glassiness to shine through in the highs. The tight, solid, and responsive lows round out the tone and perfectly balance the detail in the highs. A very musical speaker, optimized for the ever so popular Deluxe Reverb, yet suitable anywhere you want pure American tone.
StewMac '66 D-Reverb Amp Kit
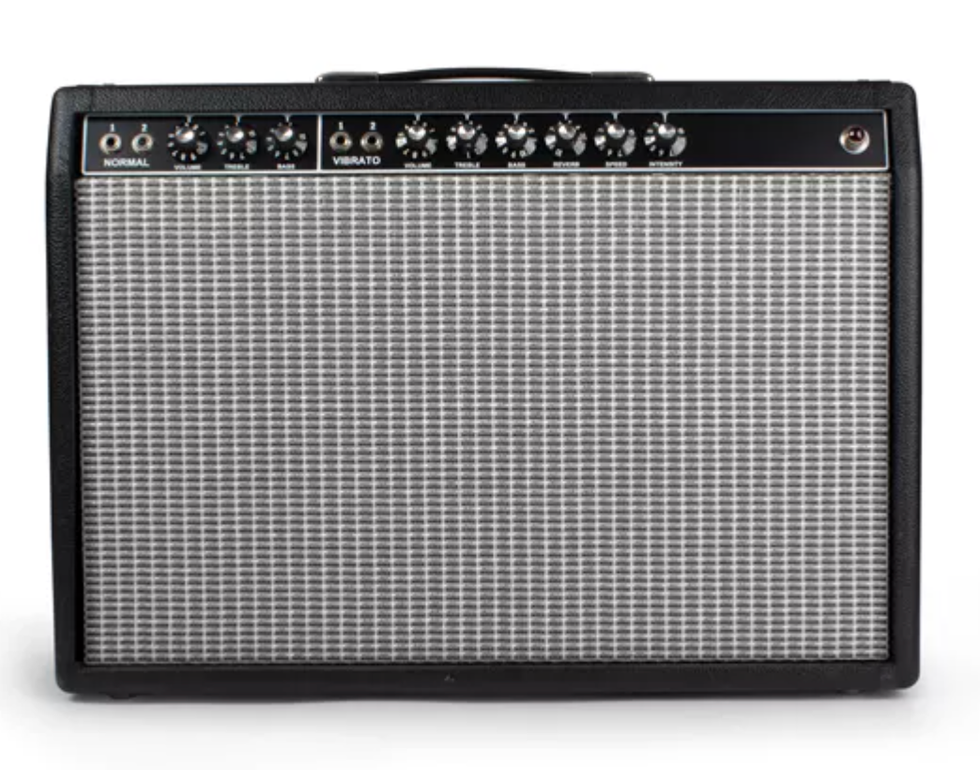
Perfect for recording and performing, the D-Reverb produces warm clarity that absolutely refuses to get lost in the mix.
One of the most popular amps ever built, the original AB763 circuit puts this amp in the happy middle between bright clarity and rich distortion. It excels in the studio and on the stage. While capable of crystal clear tones at good volume, you can push this beloved classic into beautifully saturated, touch-sensitive distortion. It's all here: clarity, distortion, and rectifier tube sag.
- Dimed & Dangerous: The Joy and Heartbreak of DIY Amp Building ›
- State of the Stomp: Build a Preset Volume Box ›
- DIY: Amp Safety 101 ›


Johnny Cash on the front porch of the Cash Cabin in Hendersonville, Tennessee.
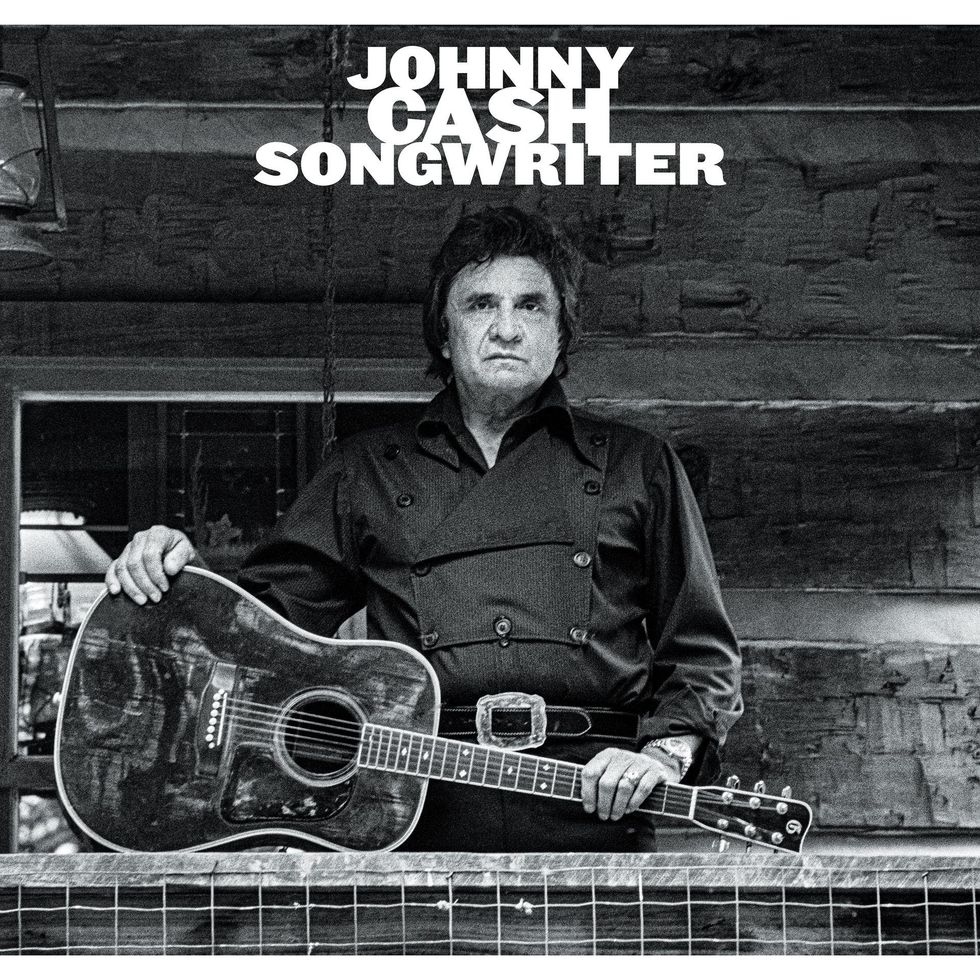
For fans who know Cash only through his much-loved American Recordings series, this is a very different artist—healthy, vital, his signature baritone booming, his acoustic playing lively, percussive, and focused. This is the muscular Johnny Cash heard on his career-defining recordings, from his early Sun Records sides like “Cry! Cry! Cry!” and “Folsom Prison Blues” to “Ring of Fire” and “Sunday Mornin’ Comin’ Down” to later, less familiar hits like “The Baron” and “That Old Wheel.” In short, classic Cash—the performer who became an international icon and remains one 21 years after his death.
In addition to theSongwriter album, it’s also worth noting that there is a new documentary, June, that puts June Carter Cash’s life and under-sung cultural legacy in perspective. Johnny wasn’t the only giant in this family. Just the biggest one.

“I think it’s important to support my father’s legacy in the world in which we live,” says John Carter Cash, who, in addition to his own work as an artist, is the primary caretaker of his family’s estimable body of work.
I recently visited the Cash Cabin—a log cabin recording studio on the Cash family property in Hendersonville, Tennessee, that was originally built as a sanctuary where Johnny wrote songs and poetry—with PG’s video team of Chris Kies and Perry Bean—to talk about Songwriter with John Carter Cash, the son of Johnny and June Carter Cash. [Go to premierguitar.com for the full video.] In this shrine of American music, Johnny Cash recorded most of the American Recordings series, and many others, from Loretta Lynn to Jamey Johnson, have tracked here. It’s also where John Carter Cash and co-producer David “Fergie” Ferguson took apart the original Songwriter sessions and put them back together, stronger, with musical contributions by Marty Stuart, Dan Auerbach, Vince Gill, a blue ribbon rhythm team of the late bassist Dave Roe and drummer Pete Abbott, backing vocalists Ana Christina Cash and Harry Stinson, percussionist Sam Bacco, guitarists Russ Pahl, Kerry Marx, and Wesley Orbison, keyboardist Mike Rojas, and John Carter himself. Johnny’s vocals and acoustic rhythm guitar, and guest vocals by Waylon Jennings on two songs, are all that was saved from the 1993 sessions, cut at LSI studios in Nashville.
In addition to getting the lowdown on Songwriter from John Carter Cash, he showed us some of the iconic guitars—including original Johnny Cash lead guitarist Luther Perkins’ 1953 Fender Esquire and a Martin that was favored by the Man himself—that dwell at the busy private studio. [Go to the video at premierguitar.com for an eyeful.]
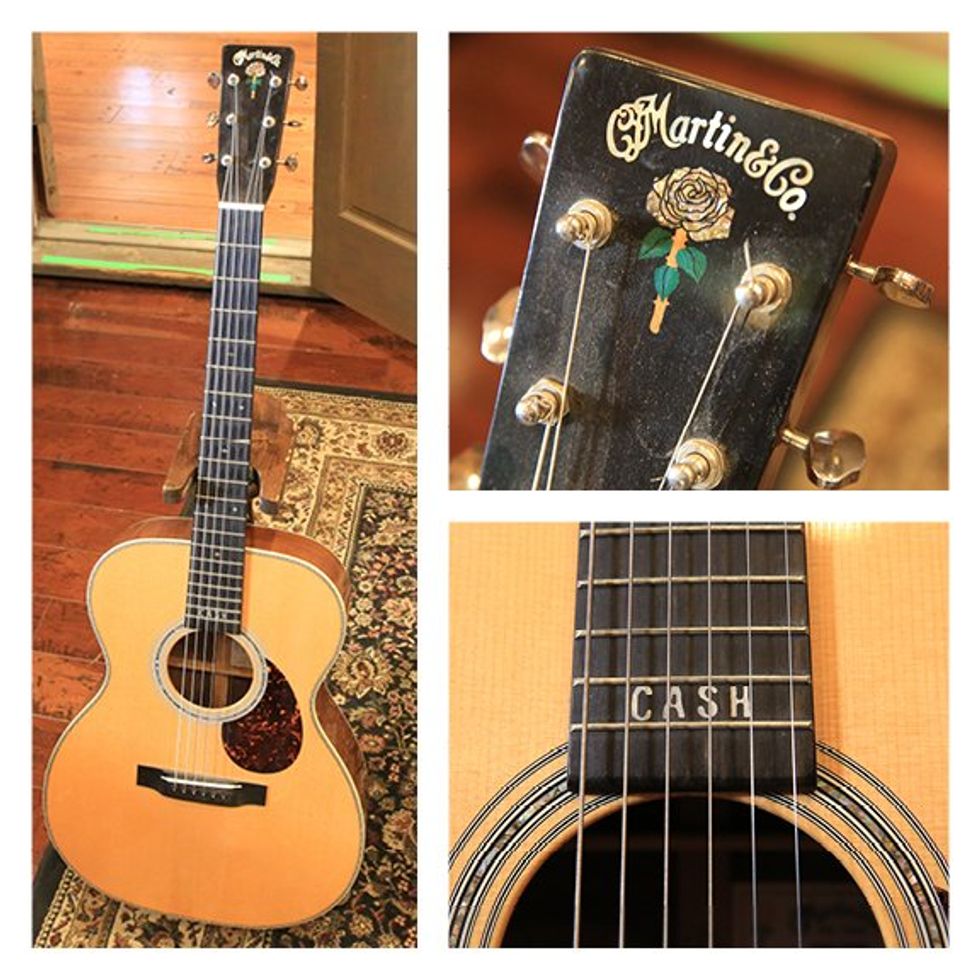
Only 44 of these Rosanne Cash signature model OM-28s were made by Martin. John Carter Cash says it’s his favorite guitar to play, and he and house engineer Trey Call attest that it’s probably the most frequently chosen instrument by guests recording in the studio.
Photos by Perry Bean
Only Johnny Cash’s original vocal and guitar tracks, and Waylon Jennings’ performances, were kept from the 1993 sessions. Marty Stuart, Vince Gill, Dave Roe, Dan Auerbach, and others contributed new tracks.
Speaking about Songwriter, John explains, “In some ways, these recordings fell through the cracks. I was in some of the sessions and can hear my guitar on some of the original recordings.” Dave Roe was also on those initial sessions, but he’d just started to play upright bass and didn’t have the finesse he lends to the revamped album.
The idea with Songwriter, John Carter relates, wasn’t to do anything more with the music than make it stronger. His dad was initially unhappy with the overall playing on the LCI recordings. “We didn’t add elements to make it about the ‘now’ or more ‘Americana’ or whatever,” he says.
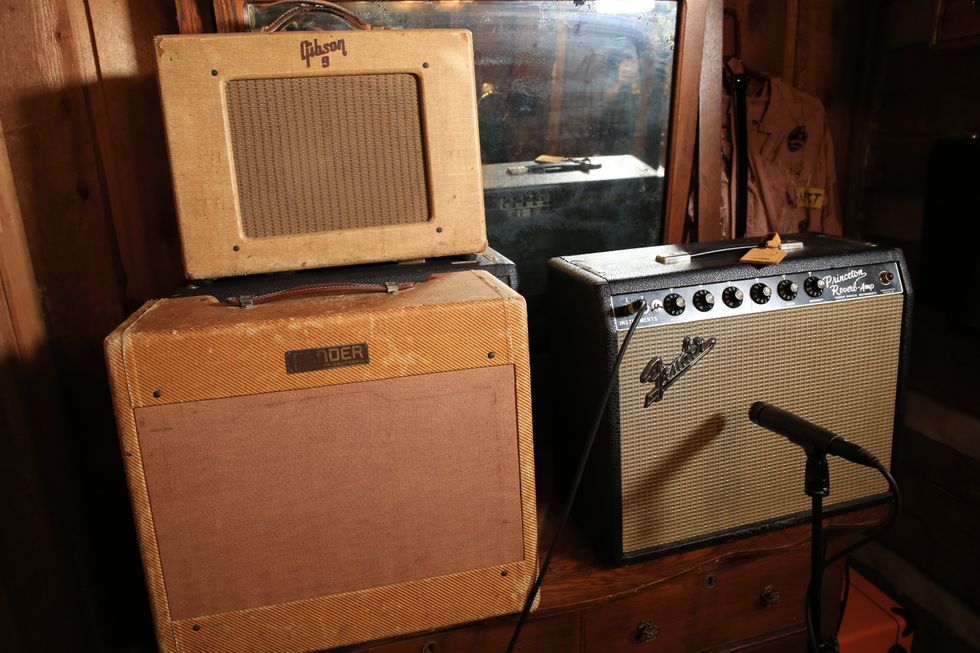
The amp room at the Cash Cabin studio has some small but potent combo treasures.
Photos by Perry Bean
Nonetheless, Songwriter does take the Cash legacy to some new places, including the realm of psychedelia. Although the song “Drive On,” about a trucker who survived the Vietnam war with internal and exterior scars, was written for the 1993 sessions, it debuted in 1994 as part of the American Recordings album. The Songwriter treatment is radically different, from the panned amp, beating with tremolo, that opens the song to the concluding lysergic odyssey of 6-string provided by John Carter and Roy Orbison’s son, Wesley. It might well appeal to Johnny, who was a musical maverick—insisting that then-controversial figures like Bob Dylan and Pete Seeger, as well as a just-emerging Joni Mitchell and Linda Ronstadt, appear on the ABC network’s The Johnny Cash Show, which aired from 1969 through 1971.
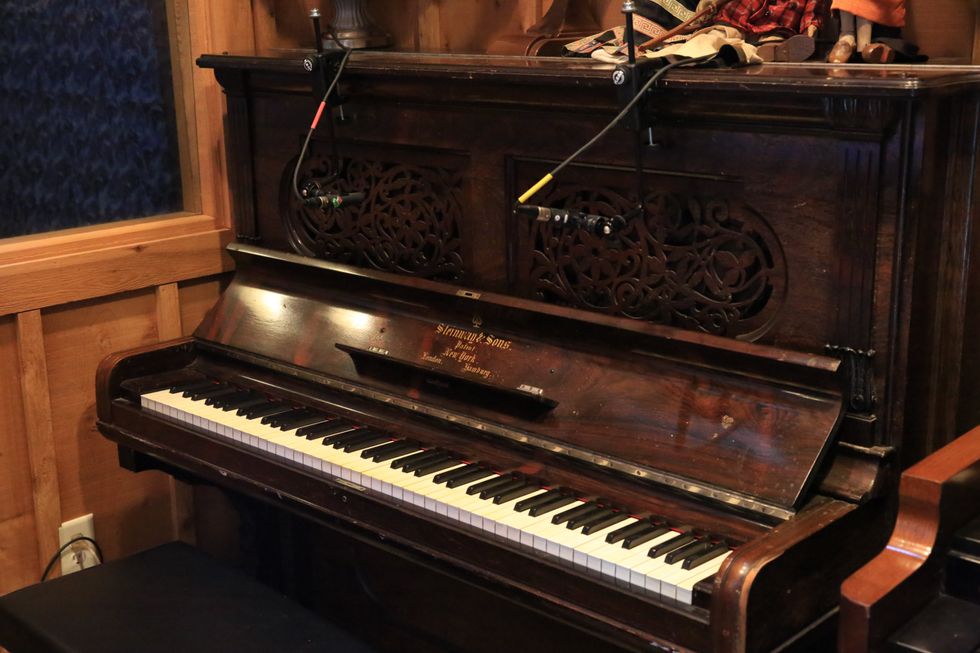
This is June Carter Cash’s piano—an antique Steinway upright that still earns its keep as one of the studio’s active instruments. Nothing in the Cabin is a museum piece.
Photos by Perry Bean
John Carter, who is a singer-songwriter and producer, and is currently at work on his own fourth solo album, notes that the sonically spacious Songwriter opener “Hello Out There” resonates with him most, emotionally, as its lyrics balance the possible end of humanity with a message of hope. But every song on the album brims with empathy and kindness in strong measure. “Like a Soldier,” which blends Johnny’s patented guitar thrum with an introspective story about his battles with addiction, and “She Sang Sweet Baby James,” about a struggling single mother singing the James Taylor song to comfort her infant, are two more examples. And the guitars are always prominent, whether they’re Russ Pahl’s steel providing ambient textures or Marty Stuart’s hard-charging country licks, which breathe fire into the album.
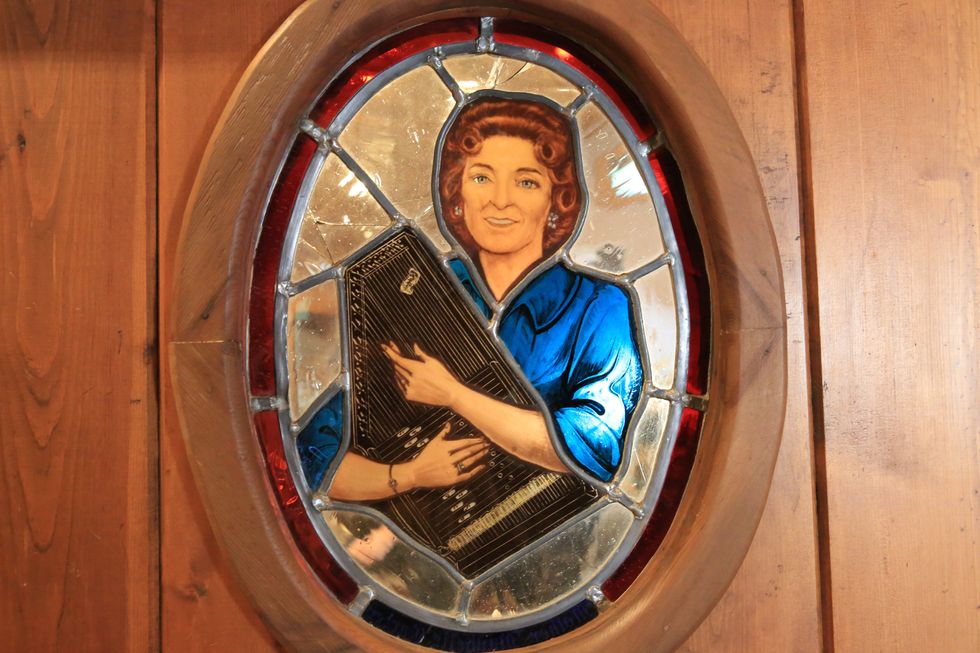
A stained-glass portrait of Mother Maybelle Carter with her autoharp. Mother Maybelle invented a style of guitar playing, where melody was executed on the bass strings and rhythm on the high strings, that influenced Chet Atkins, Merle Travis, and a host of other famed pickers.
Photos by Perry Bean
For Stuart, who toured with Johnny Cash for six years and played on many of the Man in Black’s recordings, the experience of working on the retooled Songwriter, as well as his time with the senior Cash, was “mystical—everything about him was mystical. Even after I left his band, anytime the chief called, I was available. To the day he passed away, he was the boss. So when John Carter called and said he needed guitar on some of his dad’s tracks, I went over there. It’s so natural to hear that voice in the headphones. What I always loved about playing against him is that his voice is like an oak tree. You can put anything you want next to it, and it still stands out.”
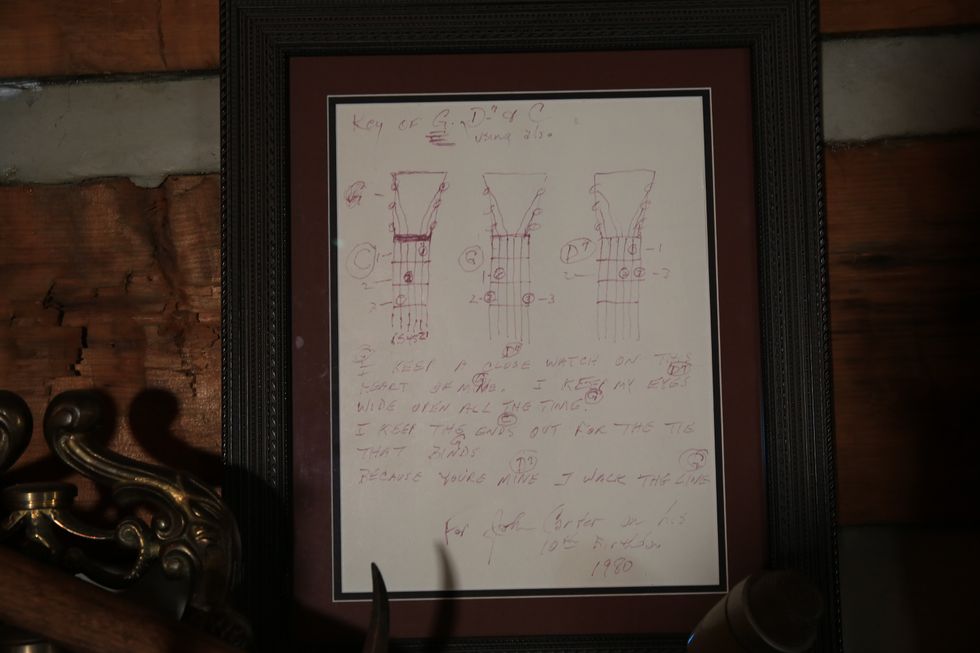
From father to son: On his 10th birthday, Johnny Cash drew John Carter Cash this chord diagram for “I Walk the Line.”
Photos by Perry Bean
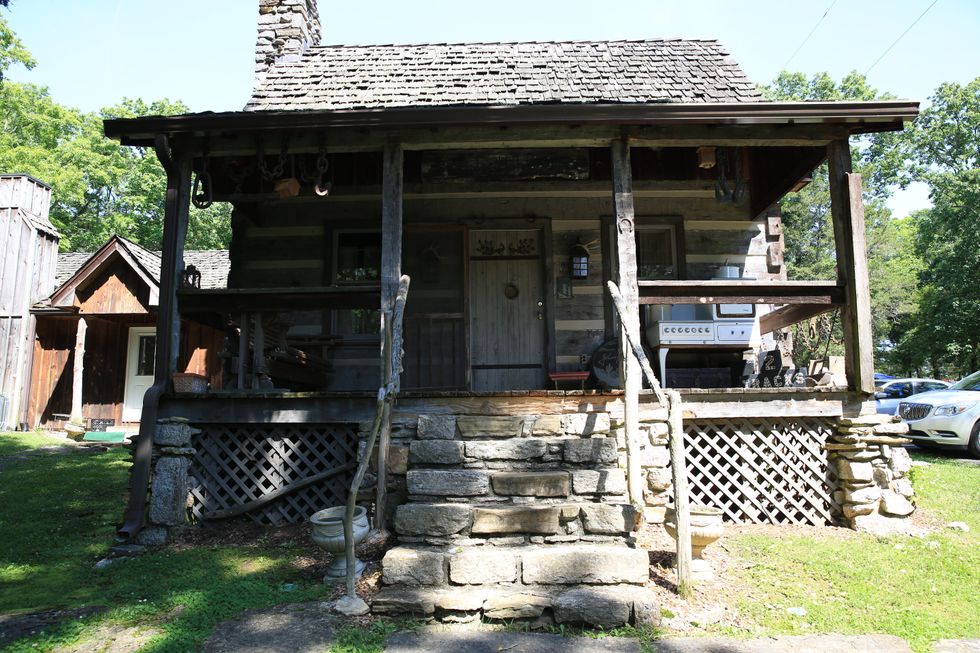
The exterior of the Cash Cabin—one of the sacred places of American music and still a busy working studio.
Photos by Perry Bean
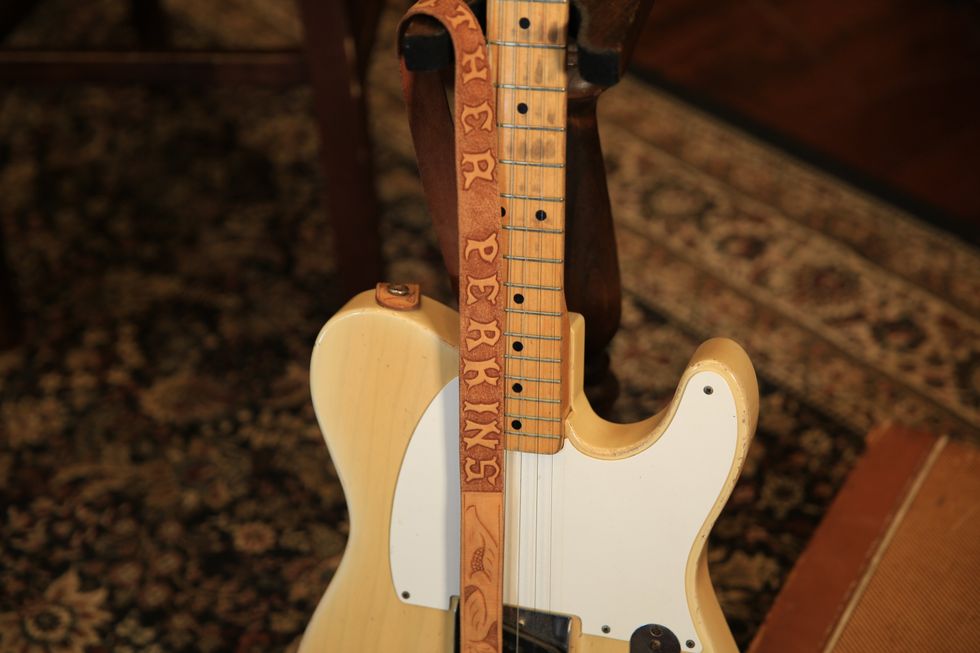
This 1953 Fender Esquire belonged to Luther Perkins, who was a member of Cash’s first recording bands and played on all of the Man in Black’s foundational recordings for Sun Records—likely with this guitar.
Photos by Perry Bean
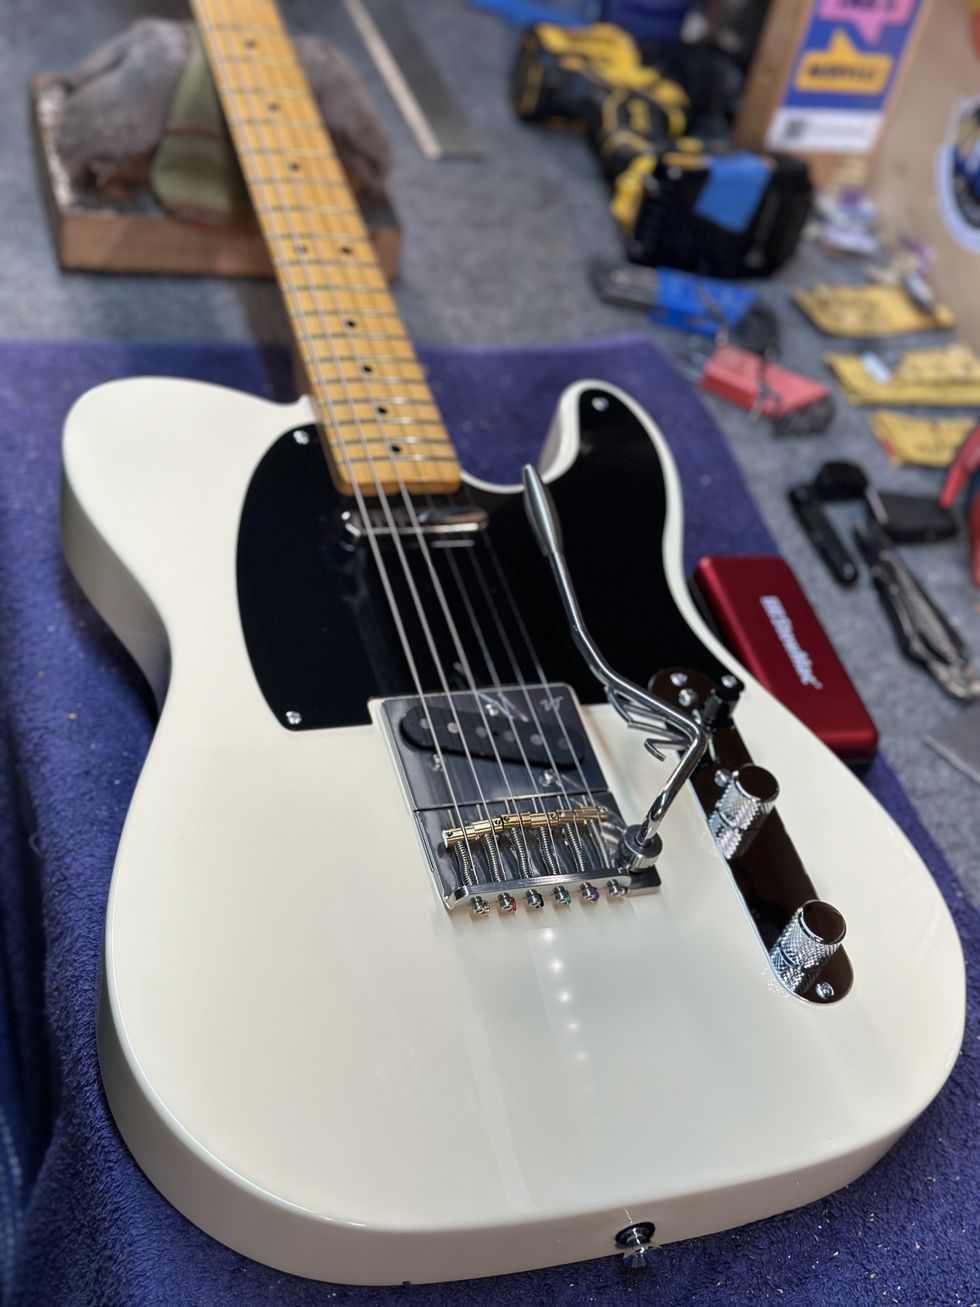
Stuart’s instruments of choice for Songwriter were a ’50s Telecaster owned by Clarence White that bears the first B-bender, a 1939 Martin D-45 that Cash used on his ’60s/early ’70s TV show and gifted to Stuart, and a silver-panel Fender Deluxe, in addition to John Carter’s ’59 Les Paul, another of Johnny’s old Martins, and a baritone that resides at the Cabin. And Stuart’s focus was getting back to the template of Cash’s original Tennesse Two and Tennessee Three bands, and the guitar style created by Luther Perkins, Stuart’s first guitar hero. “They had their own language, and it’s a foundational sound inside of me,” he says. “With Johnny’s voice and the thumb of his right hand on the guitar as a guide, that architecture was all there. I heard the album the other day for the first time, and I thought, ‘Man, John Carter and David Ferguson worked their hearts out to honor the real sound.’”
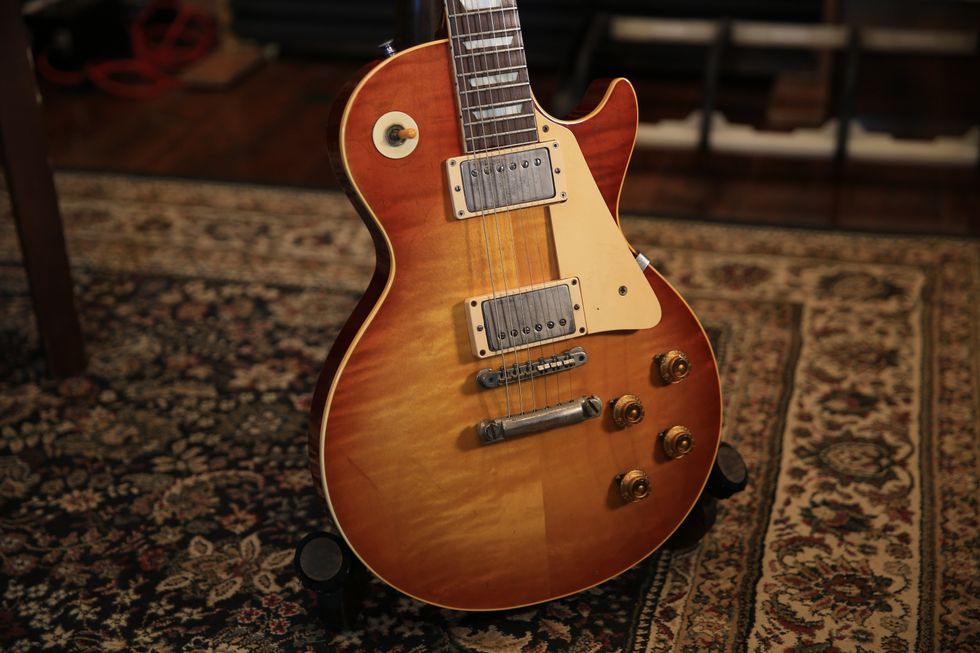
John Carter Cash bought this 1959 Gibson Les Paul at Gruhn’s in Nashville. It has a neck that is atypically slim for its vintage and appears as part of the psychedelic guitar interplay on the Songwriter song “Drive On.”
Photos by Perry Bean
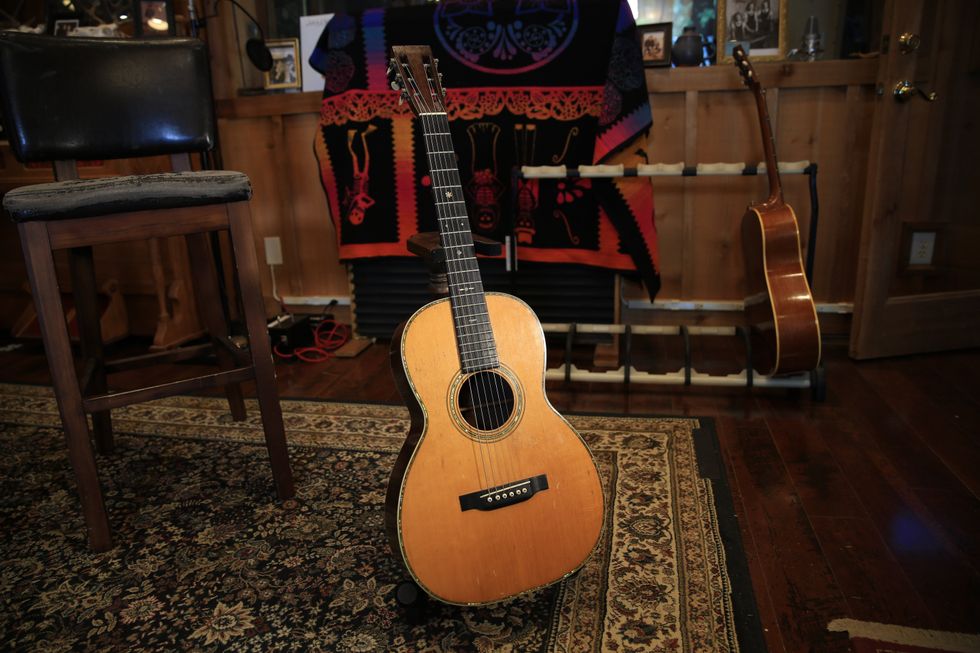
John Carter Cash remembers this Martin 40 H from his childhood as the guitar Johnny kept around the house to play on a whim or when he was chasing a song idea. The year is unknown, but as a guitar that Johnny Cash played, it is priceless.
Photos by Perry Bean
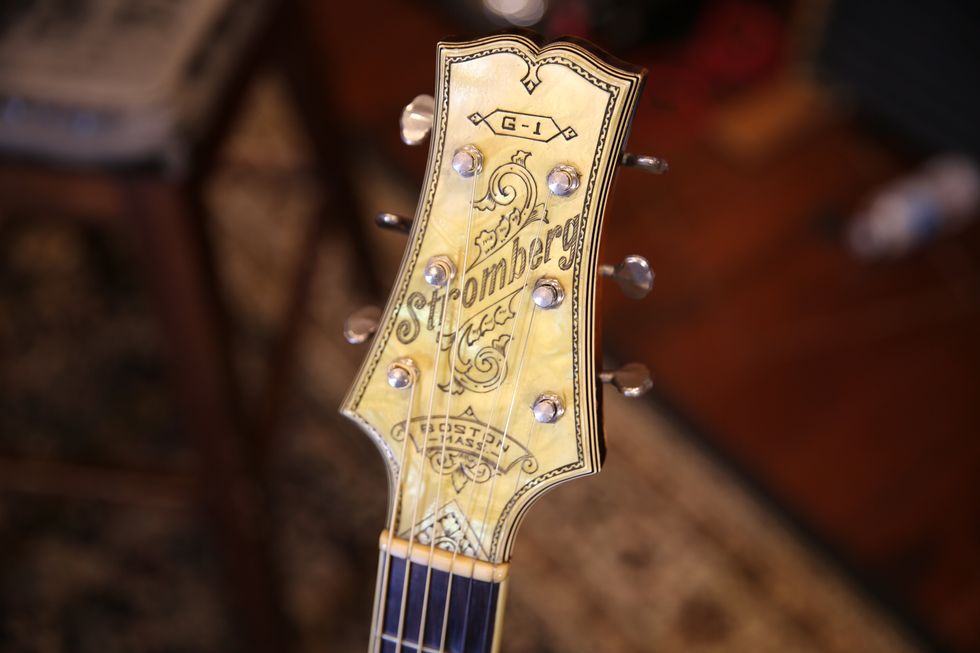
Here’s the headstock of the Stromberg that Mother Maybelle Carter used on the road while touring with Johnny Cash and her daughters. Her main guitar, dating back to the first recordings of country music, which she made as part of the Carter Family, was a Gibson L-5, but she judged this instrument hardier for travel.
Photos by Perry Bean
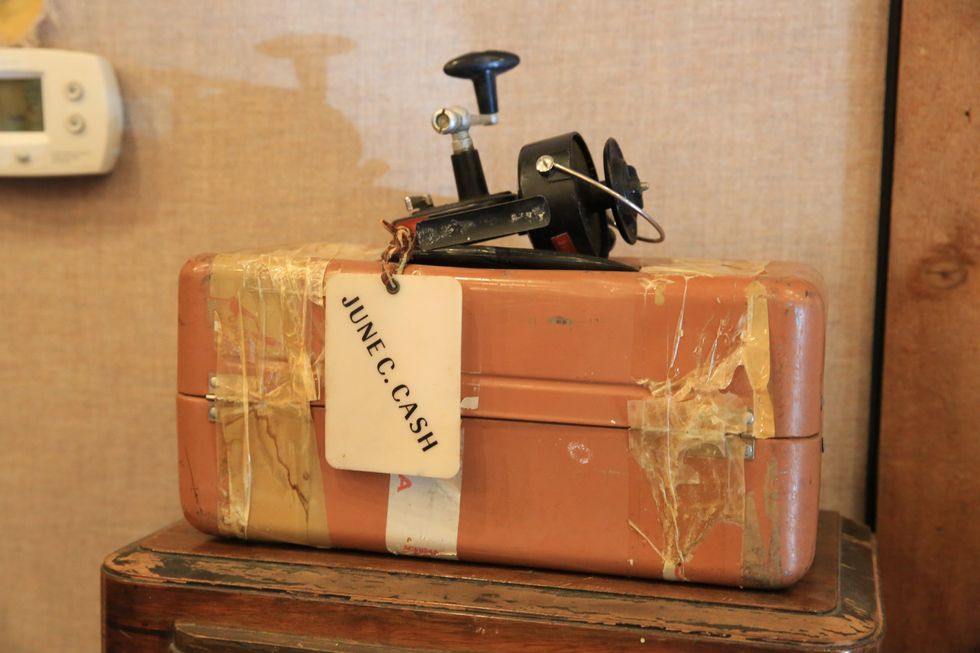
Fishing was a favorite pastime of the Cash family. This is June Carter Cash’s fishing reel and tackle box—one of the many personal and historic items in the cabin.
Photos by Perry Bean
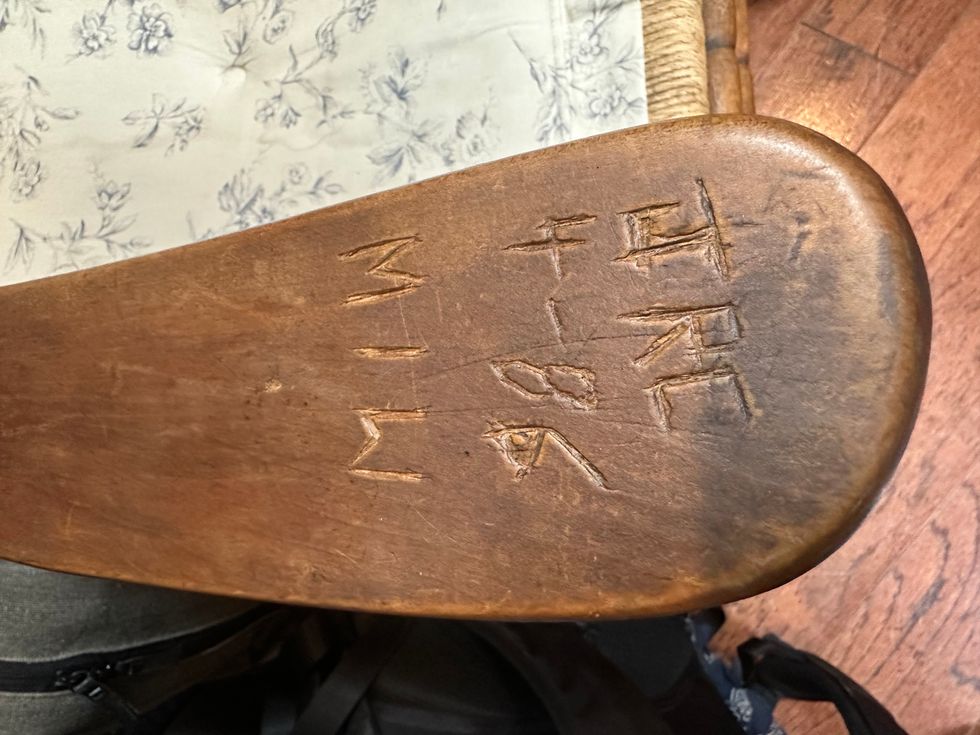
When Johnny Cash completed his novel about the apostle Paul, titled Man in White, he commemorated the occasion by scratching his initials and the day into the arm of the studio’s rocking chair—his favorite place to sit.
“In so many ways,” John Carter allows, “my father is always with me. People everywhere still love my father’s music. For instance, a 15-year-old kid wrote saying that without the strength through hardship my father expressed in his songs, he would not be alive. So, I think it’s important to support my father’s legacy in the world in which we live.
“My father made a distinction between the business of Johnny Cash and himself,” John Carter notes. “It’s almost like I’ve studied Johnny Cash my whole life, and so I can tie the two together somehow and still go through the healing process of losing a father while embracing him and his work on a level that spreads his music’s joy and brilliance to the world. I believe that his goal for his music and his life was to share with other people out there who connect on a level of the heart.” And that echoes, boldly, throughoutSongwriter.